Mini Book Binding Marathon! Make 10 miniature books with us. Step-by-step detailed tutorial

Enjoyed a marathon session of making miniature books, using the 'perfect' binding technique. ('perfect' is the name of the binding style... not us being immodest! :) )
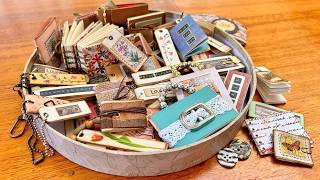
It's such a joy to savour and feel all the lovely printed papers to choose from, and make cute little covers for each book.. each cover with its own style and details.
Wishing you many many happy hours spent binding beautiful books and forgetting all your worries while engrossed in the process. It's a superb mental and digital detox! Try it! :)
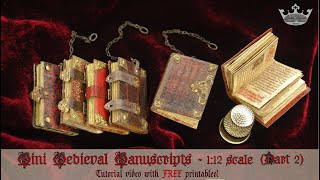
If you like this video, watch this one too! • How to make a Miniature Book for some...
DETAILED INSTRUCTIONS:
You will need:
scissors, craft knife, kitchen knife with a serrated edge,
ruler, glue, binder clip, plain paper for the inside pages,
coloured paper for the cover and endpaper, and a piece of thick card.
Cut 24 pages of size 3 x 4 cm, for each mini book.
You can use any paper of thickness between 80120 gsm.
Align the pages and hold them together tightly, using a tight binder clip.
Cut some grooves along the spine, using a serrated kitchen knife.
Do this carefully and thoroughly. Depth of grooves should be at least 0.5 mm.
Cut a piece of paper roughly 3 x 4 cm, for the spine of each mini book.
Apply glue thoroughly to the grooves in the spine.
Stick the paper to the spine and firmly press and remove extra glue.
Leave to dry for 3060 minutes.
Cut 2 pieces of the thick card for each book, each 3.1 cm by 4.2 cm.
Choose coloured paper for the book cover.
Cut a piece of coloured paper roughly 10 by 7 cm.
Stick the 2 cards on the cover paper, leaving enough room for the spine in the middle.
Trim the edges. Apply glue to the flaps and fold and press well to stick.
You can keep the cover simple or add details to the corners and spine.
Choose endpaper to match the cover, and cut 2 pieces of 6 x 4 cm for each book.
Fold in the middle and stick the end paper to the bound pages.
Apply glue on the endpaper and attach to the cover.
Have fun decorating the cover, with stickers or art.
Enjoy the process of making many different covers for your mini books!
You can also give them as gifts to loved ones, with little notes inside!
TIMESTAMPS
00:00 Easy tutorial: making 10 miniature books!
00:12 You will need
00:21 Cutting the pages
01:02 Binding the pages together
02:59 Making the Cover
06:56 Making End Paper
08:16 Attaching the Cover
09:09 Decorating the cover
10:04 The first mini book is ready!
10:13 Choosing covers and end papers for all the books
13:03 Finished!