150 Gallon DIY Mini Pond with the Best Aquarium Filter made from a Trash Can!

This is my 150 Gallon Mini Pond with the Best Aquarium Filter made from a Trash Can!
Hello everyone, it’s Pierre, the Fish Beast and welcome back.
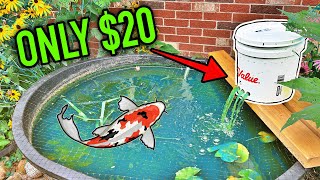
In this video, I show you how I built my 150 gallon indoor tub tank, or as some might call it, a mini pond. The reason is that it's not an aquarium and you put fish and maybe some plants in it!
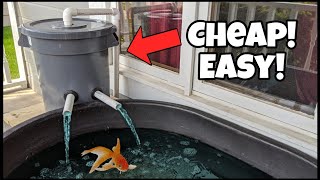
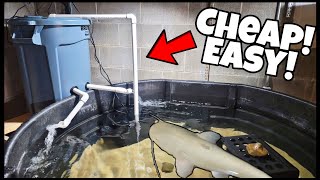
In a previous video, I explain that I had to do this to have a place to put my big fish temporarily so I could move their 210 gallon tank. I use a 150 gallon Rubbermaid stock tank which is durable and cheap. I also use a Rubbermaid Brute trash can as the main filter.
First, I used a drill with a hole saw attachment to cut a hole in the trash can. I cleaned up the hole and then attached the bulkhead to the trash can.
A bulkhead is a device that allows you to run plumbing through a hole without any water leaking through the side.
I tested it by filling the trash can with water and attaching a drain pipe. The trash can’s wall was flexible enough to flatten out with the bulkhead to create a watertight and leak proof seal.
I then put the trash can on the raised platform and got to work attaching the drain that flowed down into the tub. I attached an elbow and then a down pipe.
Now it was time to set up the pump that would move water into the trash can to be filtered.
I attached flexible tubing to the pump and then positioned it on the tub floor. I used an elbow attachment get the tubing over to the tub and attached a ball valve to control the flow of water.
Next I drilled a hole in the trash can lid and attached the tubing using another elbow. I secured that to the inside to the lid using a small piece of pipe.
I put bags of ceramic media in a basket which I placed in the bottom of the trash can.
I drilled a hole in another basket which would serve as a prefilter. I attached that to the inside of the drain pipe and used coat hangers to create a support frame. Zipties ensured that it would remain in place.
Next, I used more hangers to mount the heaters inside the trash can.
I needed a powerhead to create flow inside the trash can and you’ll see why in a minute. I mounted it using suction cups. You can see how everything looked inside the trash can.
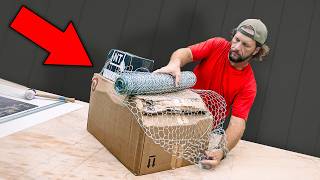
This is K1 media. It is one of the most efficient ways to filter an aquarium. The unique shape allows beneficial bacteria to colonize it well. It has a ton of surface area. I planned to use this as a fluidized bed inside the trash can.
I dumped the K1 media into the trash can and filled it with water. Initially, K1 floats as it’s less dense than water. As it cycles, it will start moving around while suspended in the water. As you can see, the prefilter basket prevents the K1 from getting into the tub.
I then proceeded to fill the tub with water. I scooped up some fish poop to provide a nitrogen source for beneficial bacteria. Thankfully the bichirs are great poopers!
I extracted tons of beneficial bacteria from established sponge filters in another tank and poured in the delicious bioactive soup as well.
And there you have it! Next step is cycling it then moving the fish.
Let me know in the comments what you think of this build and the filter I made!
Thanks for watching and Happy Fishkeeping!
#Filter #DIY #Aquarium